Web App Walkthrough
Introduction
If you would like to run this specific example on your own, you'll have to use Alchemy, since we use one of their special JSON-RPC calls, alchemy_getAssetTransfers. Please also ensure that you copy and rename env.local.example to .env.local and fill in the private data.
Example deployment of the app here: https://autonomous-airdrop-example.vercel.app
In this walkthrough, we'll discuss each of the pages and the major components that they touch.
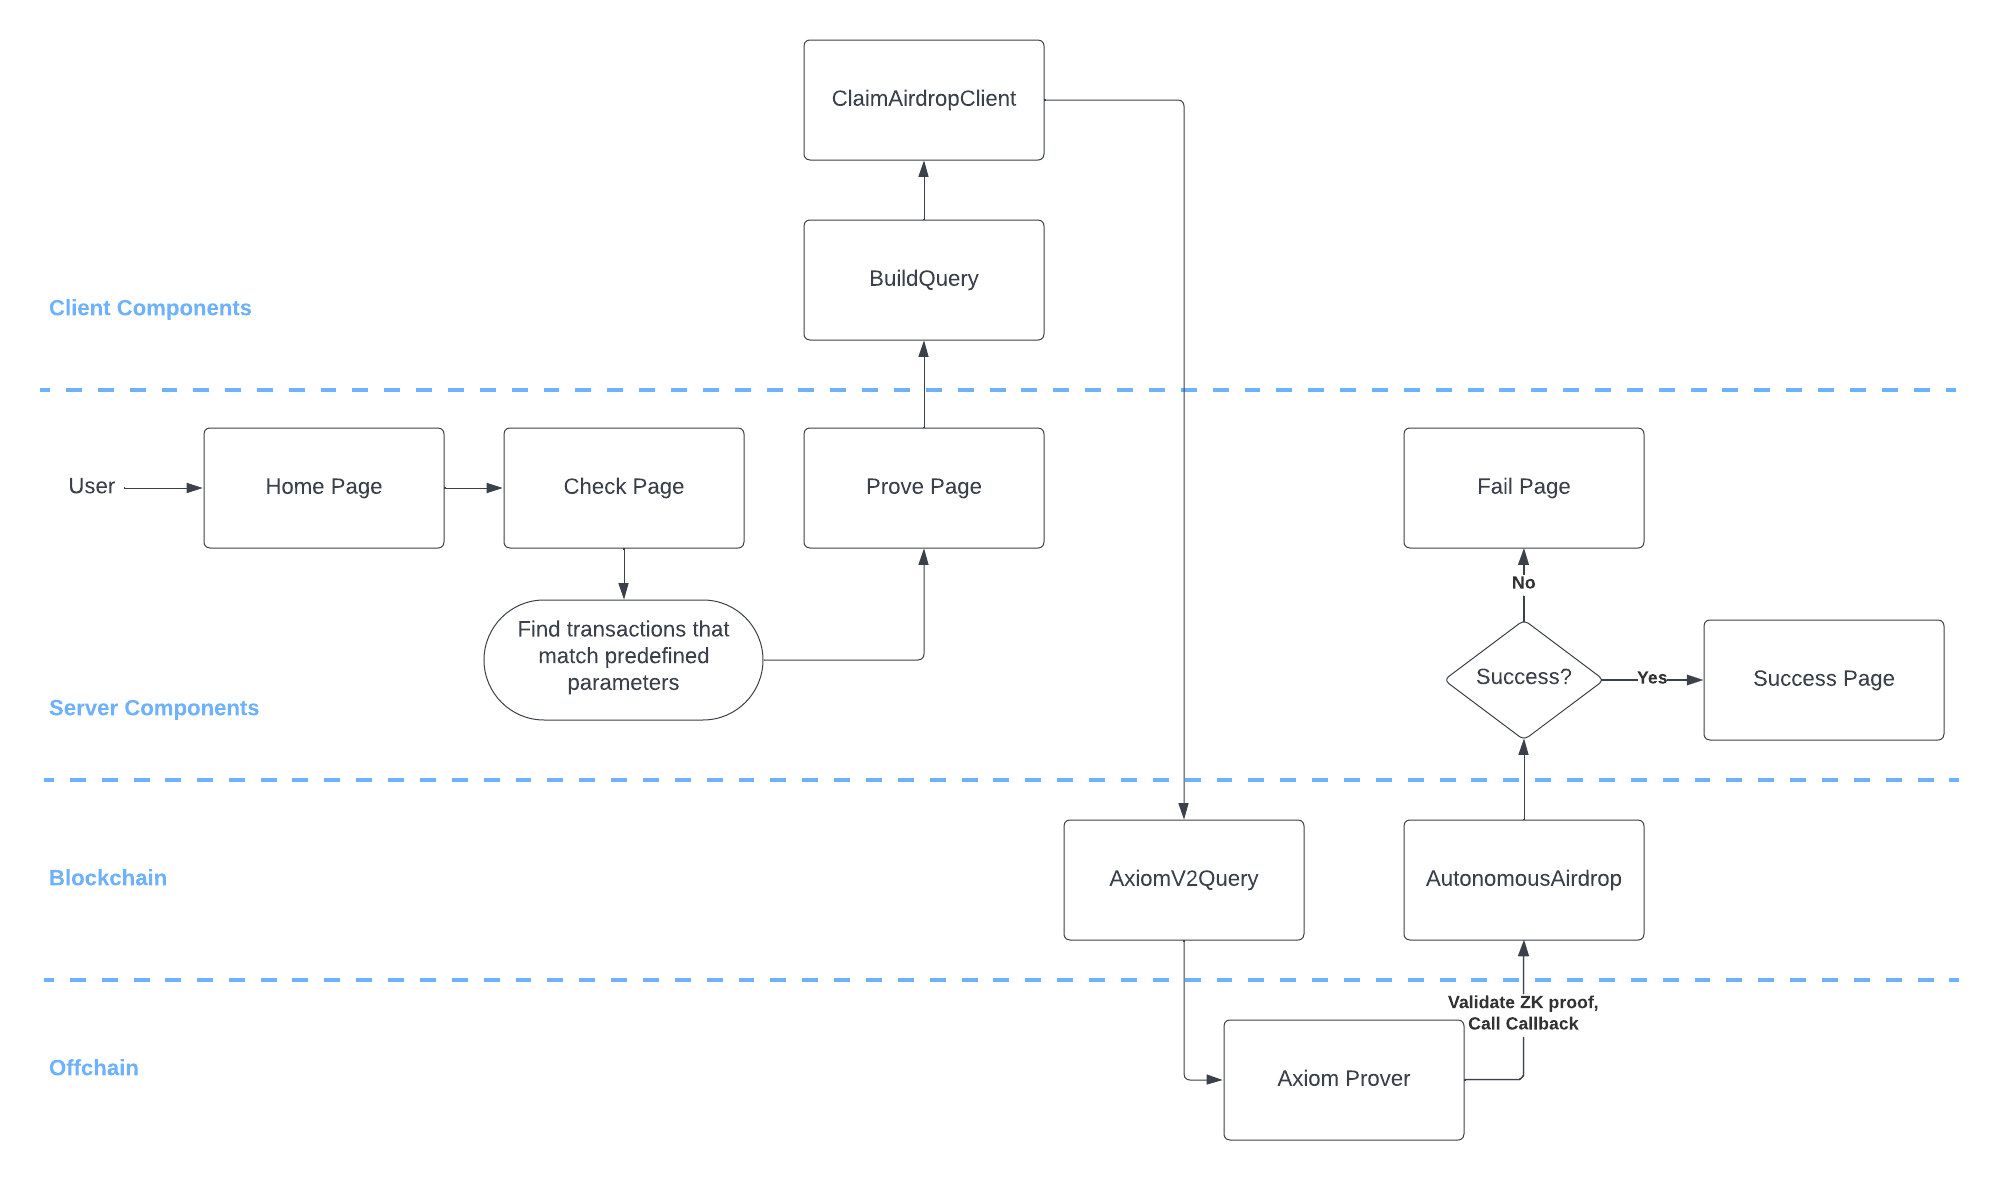
System Diagram
Here's a review of the overall system in order to re-acquaint yourself with how the app is architected.
Check Page
The sole purpose of the /check page is to check if the user has any applicable transactions in their history.
Finding applicable transactions
We use Alchemy's Transaction JSON-RPC to grab all transactions from the user that fit the criteria that it was sent from the user's address to the UniswapUniversalRouter's address.
For each transaction that's found, we get the receipt as well and then we parse through that data according to the 4 parameters outlined above to find an appropriate Event that matches. The logic is found in app/src/lib/parseRecentTx.ts.
Prove Page
The biggest work is done on the /prove page. It handles the logic for two components that handle the compute proving, query building, and sending of the query to AxiomV2Query on-chain.
Generating the Compute Proof
The useAxiomCircuit hook from @axiom-crypto/react used in BuildQuery.tsx handles generating the proof from the circuit and the inputs. It also builds the circuit and generates the parameters required to send an on-chain transaction.
...
const {
    build,
    builtQuery,
    setParams,
    areParamsSet
} = useAxiomCircuit<typeof jsonInputs>();

const { address: refundee } = useAccount();

useEffect(() => {
    if (refundee === undefined) {
        return;
    }
    if (callbackExtraData === undefined) {
        callbackExtraData = bytes32("0");
    }
    setParams(inputs, callbackAddress, callbackExtraData, refundee);
}, [setParams, inputs, callbackAddress, callbackExtraData, refundee]);

useEffect(() => {
    const buildQuery = async () => {
        if (!areParamsSet) {
            return;
        }
        await build();
    };
    buildQuery();
}, [build, areParamsSet]);

if (!builtQuery) {
    // Prevent access since query is not yet built
}
// Handle built query
...
We pass in inputs from the parsed transactions in the previous page and fill in the other parameters in setParams as well. Once the params are set, we call build() to build the circuit and generate the builtQuery params to use to call the sendQuery function on AxiomV2Query.
For additional details on using the @axiom-crypto/react package, see the Axiom React Client reference.
Claim Airdrop Client
ClaimAirdropClient.tsx handles actually using the builtQuery from the useAxiomCircuit hook to send the query and then waits for the ClaimAirdrop event to display the success page.
Integrating your own circuit
You can directly edit the app/axiom/swapEvent.circuit.ts file to override the Axiom circuit. Every time you edit the circuit, you must compile the circuit again.
npx axiom compile circuit app/axiom/swapEvent.circuit.ts